


Hey y'all!
I hope that each of you had a very Merry Christmas! Ryan, Cash and I have had a great one! We have celebrated with his parents and get to celebrate with my parents and siblings early next week. I should tell you, I LOVE Christmas (I may have mentioned that before). I love crafting and baking and decorating and watching Christmas movies and listening to Christmas music! I think I drive my husband nutso with all the Christmas cheer. I thought I might share some of my projects from this year with y'all! Most of them could be adapted for different holidays/celebrations!
I'll be honest, I meant to post this before Christmas, but I got sick the week before and my productivity went out the darn window. Even when I started feeling better, I just wanted to sleep!
Today, I'm going to give you instructions on how to make a liquor bouquet! You can do the same thing with essential oil bottles (which would be SO cute), candy boxes, or really anything that is small.

I've made these little guys for multiple occasions and thought you might be able to use them too! This one was made for someone my dad works with who happens to like bourbon. You can use any liquor you want to! I personally like making it with all different kinds of alcohol so that the bouquet is very colorful from the different bottles.
Supplies:
- 10 mini liquor bottles (plastic are best because they are light weight. You can also use more or less bottles if you want!)
- Low temp hot glue gun and glue sticks
- Ceramic Pot (the size will depend on how many bottles you are using)
- Styrofoam Ball to fit in the pot
- Dowel rods (I used the 3/16th inch ones)
- Crinkle filler
- Acrylic paint (if you want to paint your pot)
Instructions:
- Paint your pot. For this particular project, I painted it gold. You don't have to paint the pot at all. The pots that Hobby Lobby had in stock all had scratches or dings on them, so I painted it to hide the imperfections. You don't need much paint to make a difference and the thinner the coats you put on, the faster it dries!
- Hot glue the styrofoam ball into the pot. This keeps it from moving around when you go to stick your "flowers" (a.k.a. liquor) into the pot.

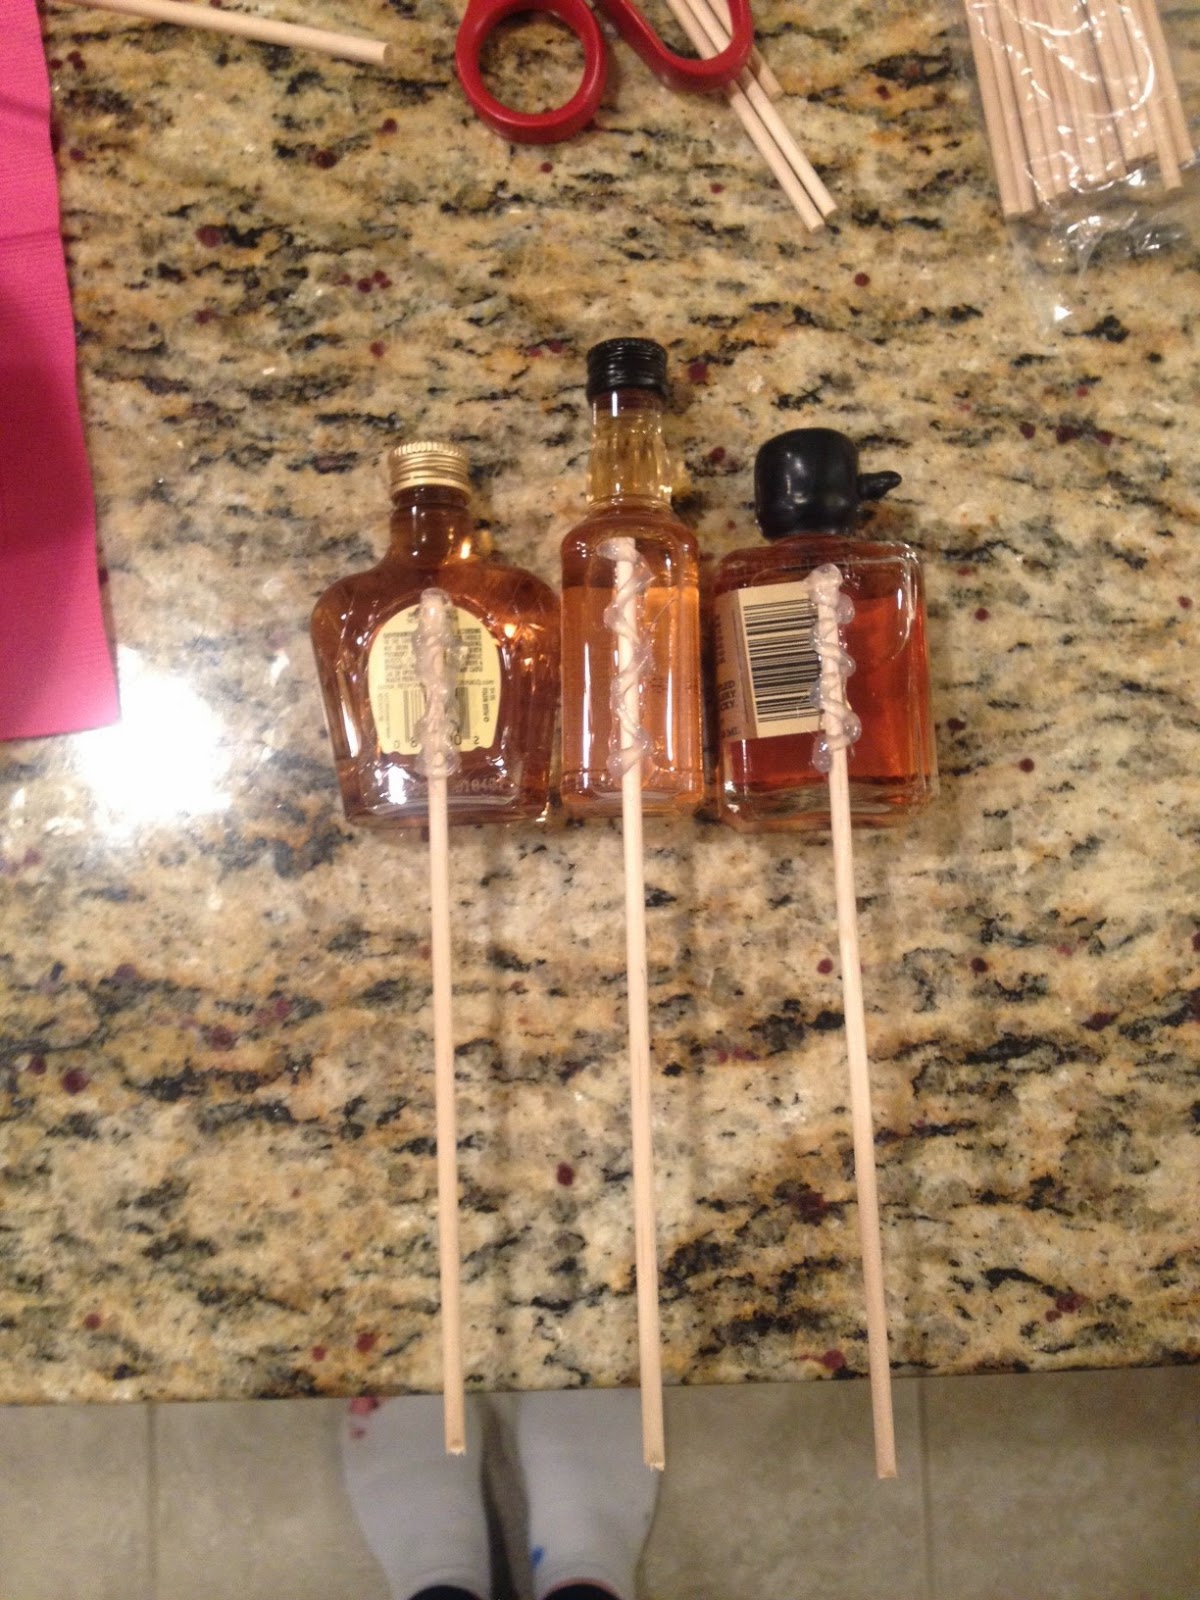
- Glue the liquor bottles to the dowel rods. This is not the time to be stingy with the hot glue and you want to make sure it's completely dry before you can go to the next step.
- Cut the dowel rods to the desired length. I had no problem using scissors. They would make a significant dent in the rods and they would break at that point easily. You will want the rods to be shorter for the front of the bouquet and longer in the back.
- Once the glue is completely dry, begin placing the dowel rods into the styrofoam base.

- Now you will want to add your crinkle filler, a bow if you want or a sign (happy birthday, congrats, etc)
Project COMPLETE! The first one I made took a little while to figure out
placing, but this one took me about 25 minutes in total, including
painting the pot. Did you do any fun crafts for the holidays? I would love to hear about them!